Questions:
I own a Sony HandyCam AVCHD HDR-SR11 video camera and I use it to record high-definition video game gameplay. My only issue is that the camera creates very, very large video files that take forever to import into iMovie and then to export, and then to upload to YouTube. If there is any way to make the file size smaller so that these times can be cut down, I would appreciate it!
Thursday, June 30, 2011
Press Release- About Mac OSX Lion
SAN FRANCISCO, June 7 morning, Apple officially released Mac OS X Lion. The new
Mac OS X Lion over 250 new features, including support for multi-touch, full screen,
auto-save the document, adding AirDrop functions. The system will be available in July
this year, priced at $ 29.99.

The new Mac OS X Lion will
be available only in the App Store to download the upgrade cost 29.99 U.S. dollars, and
will not provide discs for sale. System to download packages of about 4GB, can be
shared by authorized individuals to other Apple devices without purchasing multiple
copies.
Related articles:
Mac OS X Lion over 250 new features, including support for multi-touch, full screen,
auto-save the document, adding AirDrop functions. The system will be available in July
this year, priced at $ 29.99.
The new Mac OS X Lion will
be available only in the App Store to download the upgrade cost 29.99 U.S. dollars, and
will not provide discs for sale. System to download packages of about 4GB, can be
shared by authorized individuals to other Apple devices without purchasing multiple
copies.
Related articles:
Mac OSX Lion- The world's most advanced desktop operating system advances even further.
Learn more about tips for mac, please go to the homepage website.Tuesday, June 28, 2011
Impeccable Mac HD camcorder video Converter simplifies your editing and playback footage
It is fantastic to take shooting along with a HD camcorder such as Sony HDR, Canoon HF, Panasonic, JVC, etc. The HD pictures and footages from such high definition camcorders really refresh our eyes. Besides, we can create our own videos in base of those HD footage and then share the work with family and friends. It will be more wonderful if upload them to Youtube for share with on line visitors.
Usually, we edit and create our own family videos with iMovie, Final Cut Express or Final Cut Pro on Mac, and most of the clips from common camcorder say Kodak are in MP4 or MOV format, which can be easily import to iMovie, Final Cut Express or Final Cut Pro for editing.
However, shooting footages from HD camcorder Sony HDR, Canoon HF, Panasonic, JVC are in AVCHD M2TS/MTS format, which is difficult to read by Mac software iMovie, FCE and FCP. Then what's next? How to edit HD video from AVCHD camcorder?
Shareware Mac HD Camcorder Video Converter> provides a solution. HD Converter for Mac which is developed by Doremsoft is an editing software dependent from iMovie for making HD videos not only AVCHD, but also HD MOD, TOD, MPEG-4, TS, TRP, etc on Mac system. Editing function of software HD Converter for Mac including clip, crop, merge, rotate, apply effect, solution setting, audio or video setting, etc
What's more, HD Converter for Mac acts excellently to convert HD videos to FLV for Youtube and to transfer HD videos to SWF for other flash share website, also can turn HD video to MOV/MPEG-4 for iMovie, Final Cut Express, Final Cut Pro.
Learn more about tips for mac, please go to the homepage website.
How to burn video from HD camcorder to DVD
Most Mac users burn their own DVD disc with iDVD. iDVD is a DVD creation software application made by Apple In. for Mac OS X. iDVD to Mac is what Windows Movie Maker to Microsoft Windows. iDVD allows Mac users to add QuickTime Movies, MP3 music, and digital photos to a DVD that can then be played on a commercial DVD player.
That is to say, common video in MOV, MPEG-4, AVI format can be import to iDVD for burning into DVD disc. How about videos in other format, say footages form HD camcorders? How to burn those HD video to DVD?
Well, clips from Kodak Zi8, Kodak Zi6, Kodak Playsport are in HD MOV format which is accepted by iDVD, thus can be easily convert to DVD with iDVD. However, footages from AVCHD camcorder like Sony HDR, Canoon HF, Panasonic, JVC are in M2TS/MTS format, which is a trouble for iDVD. Then you have to convert HD video to iDVD and then import to iDVD for burning to DVD by other software, such as Doremisoft Mac HD to DVD Video Converter.
Steps to burn HD to DVD On Mac with Mac HD Video Converter as well as iDVD are easily as follow.
1. Import HD video to Mac Hd Camcorder Video Converter
2. Select iDVD as output format
3. Start HD video to iDVD conversion
4. Backup converted iDVD video to iDVD
5. Start burning DVD
Tip: Before burning HD video to DVD, you can also import HD video to iMovie for personalizing the video or making a unique masterpiece. Refer to How to edit HD video in iMovie.
Learn more about tips for mac, please go to the homepage website.
How to transfer Sony DCR M2TS Video to Mac for editing M2TS footage iMovie or FCP
Most of Sony DCR camcorders record video in SD MPEG-2 such as some Sony DCR-SX series, Sony DCR-SR series, Sony DCR-DVD series. However, there is an exception: Sony DCR-SR5E which shoots AVCHD footage. Obviously, you can't playback AVCHD video for the video format can't be natively supported by QuickTime. However, VLC media player should be your excellent assistance. But how about editing the .m2ts shooting? Won't take the risk of losing quality, when editing it? At first, transfer the footage to Mac for backup. Then begin your editing job.
Convert M2TS to Mac-friendly format like MOV or MP4, for which has better compatibility with iMovie, FCP. In this way, you can smoothly edit the footage. Doremisoft Sony M2TS Converter for Mac is such a powerful program that can not only convert M2TS to wide range of popular multimedia formats like MOV, FLV, M4V, MP4, AVI, H.264, etc, but edit the HD M2TS on Mac as well. It makes it easily to upload M2TS footages to YouTube, edit it in iMovie or FCP, enjoy shootings on iPad, iTouch, Creative ZEN and other portable players as well.
Let's have a look at how to Convert Sony DCR to Mac:
Step1: Add Sony DCR Video on Mac
Click "Add File" to upload your chosen Sony DCR video to Mac AVCHD Converter after you launched it.
Step2: Set Output Video Format
Click "Profile" to open the Profile drop-up list to select MOV, or MP4 as output video format for Mac OS, Quicktime, iMovie, FCP, FCE, etc.
Step3: Convert Sony DCR Video to Mac
Press the "Start" button to convert Sony DCR SD video or AVCHD MTS/M2TS files to Mac.
After conversion finished, just import the generated file into iMovie and begin your movie making.
Learn more about tips for mac, please go to the homepage website.
Monday, June 27, 2011
How to upload HD video to YouTube for better sharing with others on Mac?
When HD video comes to YouTube
YouTube’s reducing limitation of uploading video length and video memory encouraged more and more net friend to upload a period of video to YouTube website. Moreover, YouTube offer the option of watching some videos in720p HD and even 1080p, this completely light the passion of uploading HD video to YouTube. Here I collected some feedback when our net guys upload their HD video to YouTube:
1 "The resolution for HD video file is unique:1280 * 720."
2 "Do not upload videos against the terms and conditions of Youtube.com"
3 "Youtube.com still has not finalized HD support. Even if you upload a HD video file, YouTube may not support it."
4 "HD video files can be large, it may take quite some time to upload."
What can we do to remedy this pity on YouTube?
Usually the video spec recommended by YouTube is:
MPEG4 (DivX, Xvid, H.264) format
1280*720 resolution or 1080p
128k Mono or 320k Stereo MP3/AAC audio
24,25 or 30 frames per second
Up to 1GB file size and 15:59 min. Duration
Many HD videos may come in AVCHD (mts or m2ts), TS, TP, TRP, MOD, TOD, MKV formats, and they cannot be directly uploaded to YouTube HD. Therefore, to upload such HD videos to YouTube with the best quality, you will need to convert them to MPEG4 format that meets the above criteria. If you are running Mac OS, Doremisoft HD to YouTube Converter for Mac will be good choice to remedy this pity from YouTube.
Relative guides when use Mac HD Converter
Just several manse click on Mac HD Converter will enable you convert HD to YouTube: Import HD video to Mac HD Converter-> Select MPEG4 format and set the best settings for uploading HD to YouTube-> Convert HD to YouTube.
Tip: Set the settings according the HD Spec recommended by YouTube .See the figure below:
Learn more about tips for mac, please go to the homepage website.
Sunday, June 26, 2011
So easy to import Sony handycam shootings to Mac!
Fact and Problem
Sony handycam is wellknown camcorder to take shooting, most people choose camcorder of this kind because of its high quality of recorded video. Sony HD Handycam series including HDR-XR350V, HDR-CX350V,HDR-CX300, HDR-XR200V, HDR-XR520V, HDR-FX1000, HDR-CX520V, HDR-FX7, GVH-D700, DCR-DVD850, DCR-DVD650, DCR-HC52, etc take videos in AVCHD MTS or M2TS format, which is hard to read by playing or editing software on Mac.
First Trial ---- Sony Vegas Pro
Sony Vegas Pro is specially designed for Sony brand camcorders, in the purpose to allow shooting fans to edit AVCHD M2TS and MTS records from HD Camera or Camcorder. And this program does act excellent in AVCHD video editing. However, software Sony Vegas Pro is compatible of Windows system, but can not be used on Mac platform.
Best Solution.
Since Mac editing software such as iMovie, Final Cut Express, Final Cut Pro, iDVD, ect all love QuickTime MOV video, the problem can be easily solved if convert AVCHD M2TS, MTS video to MOV before import AVCHD to Mac software.
Then a sharp software is essential to copy with the Sony AVCHD to Mac Conversion.
Software recommended
So many multimedia softwares were developed and launched in the market. Which is the best to select?
I think factors should be taken into concern are output quality, reliability and stability, conversion speed, accessional function, after sale service, and price of the conversion program. And software which can be considered good in above four or five aspects is excellent for the Sony AVCHD to Mac conversion.
Doremisoft Sony AVCHD to Mac Converter values five stars. This software is powerful enough to convert Sony AVCHD to QuickTime MOV for Mac editing software. What's more, it can be used as an AVCHD Editor for Mac software, that is to say, you can directly edit AVCHD M2TS, MTS shootings from Sony handycam to Mac. The basic editing function of Sony AVCHD to Mac Converter including merge, clip, crop, snapshoot, Rortate, apply effect, set audio or video specs, change resolution of video,etc.
Screenshot about Mac AVCHD Video Converter:

For more information about Sony AVCHD to Mac Converter, please visit import sony handycam to mac.
Know how to convert Sony Handycam to Mac files with Sony AVCHD to Mac Converter, please click the link.
If you want to upload your sony handycam video to website, you can use AVCHD to Flash Converter Mac.
Sony handycam is wellknown camcorder to take shooting, most people choose camcorder of this kind because of its high quality of recorded video. Sony HD Handycam series including HDR-XR350V, HDR-CX350V,HDR-CX300, HDR-XR200V, HDR-XR520V, HDR-FX1000, HDR-CX520V, HDR-FX7, GVH-D700, DCR-DVD850, DCR-DVD650, DCR-HC52, etc take videos in AVCHD MTS or M2TS format, which is hard to read by playing or editing software on Mac.
First Trial ---- Sony Vegas Pro
Sony Vegas Pro is specially designed for Sony brand camcorders, in the purpose to allow shooting fans to edit AVCHD M2TS and MTS records from HD Camera or Camcorder. And this program does act excellent in AVCHD video editing. However, software Sony Vegas Pro is compatible of Windows system, but can not be used on Mac platform.
Best Solution.
Since Mac editing software such as iMovie, Final Cut Express, Final Cut Pro, iDVD, ect all love QuickTime MOV video, the problem can be easily solved if convert AVCHD M2TS, MTS video to MOV before import AVCHD to Mac software.
Then a sharp software is essential to copy with the Sony AVCHD to Mac Conversion.
Software recommended
So many multimedia softwares were developed and launched in the market. Which is the best to select?
I think factors should be taken into concern are output quality, reliability and stability, conversion speed, accessional function, after sale service, and price of the conversion program. And software which can be considered good in above four or five aspects is excellent for the Sony AVCHD to Mac conversion.
Doremisoft Sony AVCHD to Mac Converter values five stars. This software is powerful enough to convert Sony AVCHD to QuickTime MOV for Mac editing software. What's more, it can be used as an AVCHD Editor for Mac software, that is to say, you can directly edit AVCHD M2TS, MTS shootings from Sony handycam to Mac. The basic editing function of Sony AVCHD to Mac Converter including merge, clip, crop, snapshoot, Rortate, apply effect, set audio or video specs, change resolution of video,etc.
Screenshot about Mac AVCHD Video Converter:
For more information about Sony AVCHD to Mac Converter, please visit import sony handycam to mac.
Know how to convert Sony Handycam to Mac files with Sony AVCHD to Mac Converter, please click the link.
If you want to upload your sony handycam video to website, you can use AVCHD to Flash Converter Mac.
Thursday, June 23, 2011
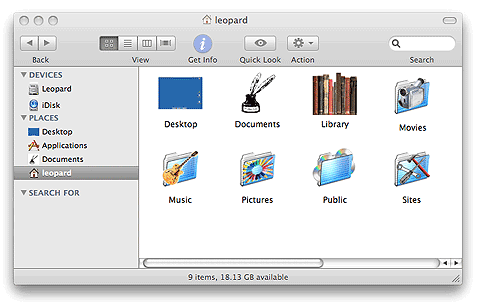
How to Change the Folder Icons On Mac OS X?
How to Change The Folder Icons on Mac?
You use the Finder on your Mac to view, organize and manipulate files and folders. Folders on your Mac may be plain, such as when you create a new one from the Finder menu. Some folders come with icons, or small pictures that help tell you what they contain and distinguish them from other folders. You can easily change a folder icon on your Mac by copying an icon from another folder, by using an icon from a collection that you download or by copying any picture on your Mac.
Application icons are all generally unique, so they stand out from one another. Folder icons may flaunt a plain blue folder facade or display a little extra decor on the folder icons to help you identify what's inside of them. File icons generally display a document with an application logo that lets you know what application created it or can open it. But you can change these mini works of art to ones of your own choosing or creation.
To change your user account icon
1 Make sure that you're logged in to the user account whose picture you want to change. From the Apple menu, choose System Preferences.
2 Click Accounts.
3 Click the Picture tab.
4 Click Edit.
5 Images window.
6 Use the slider at the bottom of the window to zoom in to your picture. You can also drag the image around in the window to adjust the framing.
7 When satisfied, click Set to make the change.
To change an item's icon to another one:
1 Select the volume, application, folder, or file whose icon you want to stamp onto another, just click the icon to select it.
2 From the File menu, choose Get Info or press Command-I to open the Info window.
3 Click the icon in the upper-left corner of the Info window to select it.
4 From the Edit menu, choose Copy or press Command-C.
5 Select the volume, application, folder, or file whose icon you want to replace.
6 From the File menu, choose Get Info or press Command-I.
7 Click the icon in the upper-left corner.
8 From the Edit menu, choose Paste or press Command-V to replace the icon.
Learn more about tips for mac, please go to the homepage website.
Wednesday, June 22, 2011
The easiest way to help you creat a new foler on Mac os x
Folders on a computer are a simple way for you and your computer to keep track of files. Applications, music and your hard drive all have folders full of files to keep everything nice and organized. Even the desktop is a folder unto itself that holds all of the other folders on your Mac computer. You can create new folders on your Mac to store documents, pictures or other files quite simply.
How to edit clips from Panasonic HDC series on iMovie or FCP
In the digital camcorder world, Panasonic HDC series are well-known handycam to take shootings and record people's happy daily life. As a matter of fact Panasonic HDC is really large family, members of Panasonic HDC includes: 1. Panasonic HDC-SD Series: Panasonic HDC-SD9, HDC-SD10, HDC-SD60, HDC-SD100, HDC-SD200, HDC-SD700, etc. 2. Panasonic HDC-HS Series: Panasonic HDC-HS250, HDC-HS300, HDC-SD60, HDC-HS200, HDC HS100, HDC-HS700, etc. 3.Panasonic HDC-TM Series: Panasonic HDC-TM10, HDC-TM20, HDC-TM60, HDC-TM50, HDC-TM30, HDC-TM200, HDC-TM300, HDC-TM700, etc.
Although it is a piece of cake to take videos with Panasonic camcorder, editing clips from Panasonic HDC video on Mac seems a trouble to many Panasonic owers. Because footages from Panasonic HDC video can not be import to any mac software, neither movie player iTunes, QuickTime nor video editing software iMovie, Final Cut Pro.
Clips form Panasonic HDC camcorders are with AVCHD MTS/M2TS format, which are not supported by playing or editing software on Mac. Since MOV is the most popular format for iMovie and Final Cut Pro, if people want to import HDC video to Mac, edit Panasonic HDC avchd on Mac, they can firstly have a AVCHD to MOV conversion with a panasonic HDC video converter for mac. Doremisoft Mac AVCHD Video Converter is such kind of shareware to meet Panasonic HDC owners' requirment, if they do not expect to loss the HD quality, then the target format should be set as H.264.
Steps to convert Panasonic HDC to Mac iMovie/FCP with program Mac AVCHD Video Converter are as follow.

Plus Mac AVCHD Video Converter is able to act as mac avchd video editor, which allow users to edit AVCHD video from Panasonic HDC series handycam directly without iMovie or Final Cut Pro.
Learn more about tips for mac, please go to the homepage website.
Although it is a piece of cake to take videos with Panasonic camcorder, editing clips from Panasonic HDC video on Mac seems a trouble to many Panasonic owers. Because footages from Panasonic HDC video can not be import to any mac software, neither movie player iTunes, QuickTime nor video editing software iMovie, Final Cut Pro.
Clips form Panasonic HDC camcorders are with AVCHD MTS/M2TS format, which are not supported by playing or editing software on Mac. Since MOV is the most popular format for iMovie and Final Cut Pro, if people want to import HDC video to Mac, edit Panasonic HDC avchd on Mac, they can firstly have a AVCHD to MOV conversion with a panasonic HDC video converter for mac. Doremisoft Mac AVCHD Video Converter is such kind of shareware to meet Panasonic HDC owners' requirment, if they do not expect to loss the HD quality, then the target format should be set as H.264.
Steps to convert Panasonic HDC to Mac iMovie/FCP with program Mac AVCHD Video Converter are as follow.
- Step1 Import Panasonic HDC Video to Mac AVCHD Converter
- Step 2 Set Output Video Format for Mac, iMovie, FCP
- Step 3 Convert Panasonic HDC Video to Mac iMovie/FCP
Plus Mac AVCHD Video Converter is able to act as mac avchd video editor, which allow users to edit AVCHD video from Panasonic HDC series handycam directly without iMovie or Final Cut Pro.
Learn more about tips for mac, please go to the homepage website.
Tuesday, June 21, 2011
How to Creat Hidden Files On Mac Os X?
Create a hidden folder in Mac OS X
Apple's Mac OS X operating system is considered UNIX-class and is constructed from pre-existing UNIX standard software. The underlying aspects of Mac OS X also function like most other UNIX operating systems. Mac OS X and other UNIX operating systems support hidden files by beginning the file name with a period. The Mac OS X "Finder" interface does not allow this operation, but most applications on the Mac OS X system do allow for hidden files to be created on the desktop.
To hide pictures, videos, or documents on your Mac OS computer, follow the proceeding informations carefully.
Instructions
Step 1 Open the application for which the hidden file on the desktop is to be created. For example, a word processing program.
Step 2
Click the "File" menu and then click "Save As."
Step 3
Click the "Desktop" as the file save location.
Step 4
Type ".filename" in the File Name box, replacing "filename" with the actual name of the file to be saved. When the filename begins with a period, it remains hidden and does not appear on the desktop.
More advanced Method:
If you're a little less trusting, or if the items you want to hide offer a great personal risk when discovered, then this method is ideal. You will create a Disk Image, choose a password to protect the file, and then hide the resulting DMG file just to make it that much harder to find.
To create a DMG (archive) file, you'll need to use the Mac Disk Utility that comes with your computer. Open this by navigating to Applications -> Utilities -> Disk Utility, and then click the New Image icon to
get started. Give the new image a name - an inconspicuous one like AP_History_Final_Essay is a good choice, as it'll hardly be given a glance in passing. Choose the size you want the disk image to be. If you're only going to store pictures and documents, 10GB should be fine. If you're going to be hiding videos, however, making it 20GB+ is better. Set encryption to AES-128 and choose a password. Format it to 'Read/Write Disk Image'.
After the image has been created, double click to mount the image. You will be prompted to enter the password you choose. Enter it to open. Copy in the files or folders you want, then unmount the file by dragging it to the icon of a trash can on your desktop. Now that you're certain it works and everything is set up the way you like, you can add a ' . ' at the beginning of the title to hide it. This will make it even more difficult to locate.
Note: This method won't deter the most determined or knowledgeable snoop. If you've got secret data proving the existence of Area 51, or anything similar, I suggest hiring a professional to do the hiding for you. This method is only intended to keep a frantic thief from getting your stuff.
Learn more about tips for mac, please go to the homepage website.
Monday, June 20, 2011
How to find the hidden files on Mac OS X?
The best way to find the hidden files on Mac OS X
The Mac OS X operating system hides important system files to protect your computer. This is a measure meant to prevent you from modifying files that shouldn't be modified, or deleting files that your computer needs to run correctly. Occasionally, you may need to find a file that Mac OS X hides. To do this, modify the search parameters in Finder.
Instructions

Step 1 Click the "Finder" icon on your Mac
Step2 Click the "File" in the Finder menu bar at the top of the screen and then choose "Find". Alternatively, type "Command" and "F." This opens the ability to search for files in Finder.
Step 3 Click the "Kind" button. Choose "Other" from the menu in order to open a window with new options.
Step 4 Click "File Invisible" from the alphabetical list of options. Click "OK" to close the options window and return to the Finder.
Step 5 Click the button beside the "File Invisible" button and choose "Invisible Items."
Step 6 Type the name of the file you're searching for in the Search Field. Press "Return."
Related articles:
How to show and hide hidden files on Mac OS X quickly?
Learn more about tips for mac, please go to the homepage website.
The Mac OS X operating system hides important system files to protect your computer. This is a measure meant to prevent you from modifying files that shouldn't be modified, or deleting files that your computer needs to run correctly. Occasionally, you may need to find a file that Mac OS X hides. To do this, modify the search parameters in Finder.
Instructions
Step 1 Click the "Finder" icon on your Mac
Step2 Click the "File" in the Finder menu bar at the top of the screen and then choose "Find". Alternatively, type "Command" and "F." This opens the ability to search for files in Finder.
Step 3 Click the "Kind" button. Choose "Other" from the menu in order to open a window with new options.
Step 4 Click "File Invisible" from the alphabetical list of options. Click "OK" to close the options window and return to the Finder.
Step 5 Click the button beside the "File Invisible" button and choose "Invisible Items."
Step 6 Type the name of the file you're searching for in the Search Field. Press "Return."
Related articles:
How to show and hide hidden files on Mac OS X quickly?
Learn more about tips for mac, please go to the homepage website.
Sunday, June 19, 2011
How to show and hide hidden files on Mac OS X quickly?
The easiest way to help you show and hide hidden files on Mac OS X.
Occasionally, you may need to locate a file that you just can't seem to find. Apple's Mac OS X operating system hides files from everyday users to prevent accidental deletion or altering. If you know what you're doing and you know you need to access some hidden files (which is also useful for recovering iPod data), you have to go through the Terminal to reveal those hidden files. Here is how to do it.
Using the Terminal
The easiest way to show hidden files is using the Terminal. Just open up Terminal (located in Applications/Utilities), paste in the following line and press Return.
defaults write com.apple.finder AppleShowAllFiles -bool YES
The Finder needs to be relaunched before the changes take effect, so type killall Finder and press Return. To hide the files again, use the following line instead.
defaults write com.apple.finder AppleShowAllFiles -bool NO
While this method is fine if you only want to change the visibility of hidden files occasionally, it is a bit cumbersome if you find yourself having to do it regularly. Read on for some quicker ways to access hidden files.
Setting up a keyboard shortcut
While Apple helpfully provided a keyboard shortcut for use in open and save dialogs, they didn’t do the same for normal Finder windows. Luckily, it’s not too tricky to set up a keyboard shortcut yourself.
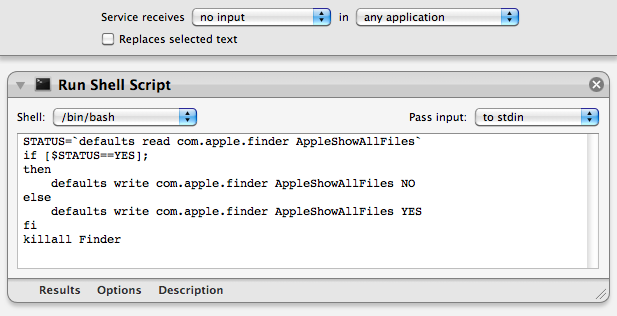
To start, open up Automator (in the Applications folder) and choose a Service template. From the library choose "Run Shell Script" and drag it across to the workflow area. In the text box paste the following command:
STATUS=`defaults read com.apple.finder AppleShowAllFiles`
if [ $STATUS == YES ];
then
defaults write com.apple.finder AppleShowAllFiles NO
else
defaults write com.apple.finder AppleShowAllFiles YES
fi
killall Finder
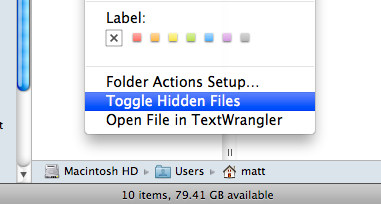
Finally, change the "text" drop-down menu to “no input” and then save you workflow as “Toggle Hidden Files”.
Now if you go to the Finder menu and look under Services, you should find a “Toggle Hidden Files” option. To add the keyboard shortcut, go to the Keyboard section of System Preferences and click the Keyboard shortcuts tab. Select Services from the list on the left, then scroll down to the bottom of the list on the right to find “Toggle Hidden Files”. Double-click on the area to the right of it, then press the keyboard shortcut you want. I used Command-Shift-. (dot).
In open and save dialogs
In open and save dialog boxes, there is a handy keyboard shortcut to toggle the visibility of hidden files. While the dialog is open, just press Command-Shift-. (dot). Just press it again to hide the files again.
For some keyboard layouts, normally in ones where a comma is used as a decimal point, you may find that this shortcut is Command-Shift-, (comma) instead.
Setting up a context menu item
To use a context menu instead of a keyboard shortcut you just need to follow the same instructions as above, but make some slight changes in Automator. Instead, change the “text’ drop-down menu to “Files and Folders” and the “any application” drop-down menu to “Finder”. Now when you right-click on a file or folder in the Finder, a new “Toggle Hidden Files” option should appear.
Learn more about tips for mac, please go to the homepage website.
Occasionally, you may need to locate a file that you just can't seem to find. Apple's Mac OS X operating system hides files from everyday users to prevent accidental deletion or altering. If you know what you're doing and you know you need to access some hidden files (which is also useful for recovering iPod data), you have to go through the Terminal to reveal those hidden files. Here is how to do it.
Using the Terminal
The easiest way to show hidden files is using the Terminal. Just open up Terminal (located in Applications/Utilities), paste in the following line and press Return.
defaults write com.apple.finder AppleShowAllFiles -bool YES
The Finder needs to be relaunched before the changes take effect, so type killall Finder and press Return. To hide the files again, use the following line instead.
defaults write com.apple.finder AppleShowAllFiles -bool NO
While this method is fine if you only want to change the visibility of hidden files occasionally, it is a bit cumbersome if you find yourself having to do it regularly. Read on for some quicker ways to access hidden files.
Setting up a keyboard shortcut
While Apple helpfully provided a keyboard shortcut for use in open and save dialogs, they didn’t do the same for normal Finder windows. Luckily, it’s not too tricky to set up a keyboard shortcut yourself.
To start, open up Automator (in the Applications folder) and choose a Service template. From the library choose "Run Shell Script" and drag it across to the workflow area. In the text box paste the following command:
STATUS=`defaults read com.apple.finder AppleShowAllFiles`
if [ $STATUS == YES ];
then
defaults write com.apple.finder AppleShowAllFiles NO
else
defaults write com.apple.finder AppleShowAllFiles YES
fi
killall Finder
Finally, change the "text" drop-down menu to “no input” and then save you workflow as “Toggle Hidden Files”.
Now if you go to the Finder menu and look under Services, you should find a “Toggle Hidden Files” option. To add the keyboard shortcut, go to the Keyboard section of System Preferences and click the Keyboard shortcuts tab. Select Services from the list on the left, then scroll down to the bottom of the list on the right to find “Toggle Hidden Files”. Double-click on the area to the right of it, then press the keyboard shortcut you want. I used Command-Shift-. (dot).
In open and save dialogs
In open and save dialog boxes, there is a handy keyboard shortcut to toggle the visibility of hidden files. While the dialog is open, just press Command-Shift-. (dot). Just press it again to hide the files again.
For some keyboard layouts, normally in ones where a comma is used as a decimal point, you may find that this shortcut is Command-Shift-, (comma) instead.
Setting up a context menu item
To use a context menu instead of a keyboard shortcut you just need to follow the same instructions as above, but make some slight changes in Automator. Instead, change the “text’ drop-down menu to “Files and Folders” and the “any application” drop-down menu to “Finder”. Now when you right-click on a file or folder in the Finder, a new “Toggle Hidden Files” option should appear.
Learn more about tips for mac, please go to the homepage website.
Wednesday, June 15, 2011
Mac OSX Lion- The world's most advanced desktop operating system advances even further.
What's New about Mac OSX Lion?
Multi-Touch Gestures
Multi-Touch gestures transform the way you interact with your Mac, making all you do more intuitive and direct. Now an even richer Multi-Touch experience comes to OS X Lion. Enjoy more fluid and realistic gesture responses, including rubber-band scrolling, page and image zoom, and full-screen swiping.
Full-Screen Apps
OS X Lion offers systemwide support for gorgeous, full-screen apps that use every inch of your Mac display. You can have multiple full-screen apps open at once — along with multiple standard-size apps. And it’s easy to switch between full-screen and desktop views.
Mission Control
Mission Control brings together full-screen apps, Dashboard, Exposé, and Spaces in one new feature that gives you a bird’s-eye view of everything on your system. With a single swipe on the trackpad, your desktop zooms out to Mission Control. Think of it as the hub of your system: View everything and go anywhere with just a click.
How to upgrade to Mac OSX Lion from the Mac App Store?
To upgrade your Mac to OS X Lion, you don’t need to drive to a store, bring home a box, and install a bunch of discs. All you do is click the Mac App Store icon, buy Lion for $29.99, and your Mac does the rest. Just make sure you have what you need to get your hands on Lion the minute it’s available.
To upgrade on day one:
Step 1: Make sure your Mac can run Lion.
Step 2: Make sure you have the latest version of Snow Leopard.
Get up to date with the latest version of OS X Snow Leopard to purchase OS X Lion from the Mac App Store. If you have Snow Leopard, click the Apple icon and choose Software Update to install the latest version.
Step 3: Download OS X Lion from the Mac App Store.
When OS X Lion is released in July, open the Mac App Store from your Dock to buy and download it. Then follow the onscreen instructions to install Lion.
Learn more about tips for mac, please go to the homepage website.
How do I convert footage from Sony HDR-CX100 camcorder to Mac?
Recently I am managing to convert my HDR-CX100 m2ts video to iMovie for some personal editing and learned some information useful and I wonder whether there is another friend experienced the same trouble with me.
Firstly I should make you clear about this:
Sony HDR series Camcorders are High Definition Models, which store video in AVCHD MTS/MPEG-2, when it output to our PC desktop, it displays as ".m2ts" format. m2ts format is a container file format for multiplexing audio, video and other streams. m2ts format is based on the MPEG-2 transport stream container and is also known as BDAV MPEG-2 transport stream. The M2TS container with filename extension .MTS or .m2ts is commonly used in AVCHD format, which is a high definition digital video camera recorder format.
Then I try to find a freeware:
Through Google research I download Mac X Free iMovie Video Converter 2.5.0.
Mac X Free iMovie Video Converter, a professional free iMovie video converter, is especially designed to convert all kinds of HD and SD videos including MKV, M2TS, WMV, AVI, FLV, MPEG, RM etc to iMovie supported format MOV, MP4. You can easily import MTS to iMovie, import YouTube to iMovie, convert AVI to iMovie, convert MP4, WMV to iMovie, import MOD to iMovie, and convert MPG to iMovie.
From the screenshot we can clearly know about this software:

1 allow import m2ts video.
2 Support clip video
3 The “option” including “Target File Name, Audio Language, profile Setting” these three aspects.
But what if I want additional function? For instance:
I hope to create several video parts one time clip not just one.
Can I crop the size of the original video?
If it’s possible, I wish I can create a special movie effect.
Absolutely Mac X Free iMovie Video Converter 2.5.0. Cannot do it in an easy way.
However, all things come to those who wait and I finally found excellent software named Sony HDR Video Converter for Mac. Apart from transfer Sony HDR video like AVCHD MTS, MPEG2, mini DV, etc to MOV, MP4, M4V, 3GP, H.264 for Mac. It offers outstanding functions as following:
1 Clip a single video to several parts and don’t have the quantity limitation.

2 Crop the video size just by move your mouse, so you can remove the unwanted part of the image.

3 Design the effect as professional as possible which including “Brightness, Contrast, Saturation" and effect actually cover “Gray, Emboss, Old Film”.

4Allow you see the conversion procedure by yourself, so you can see the any micro change of video quality ,video content lost etc.
Since I tried the Sony HDR Video Converter for Mac the first time, I’m fascinated by its powerful function.
Learn more about tips for mac, please go to the homepage website.
Related articles:
1. How to convert mts to fcp with mts to fcp converter for mac?
2. How do I import HD video to Final Cut Pro for editing
Tuesday, June 14, 2011
List of the Most Popular PDF Converters on Mac
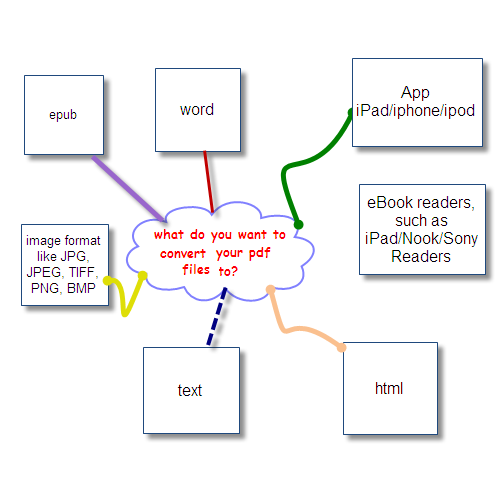
How to Convert Your PDF Files to a Different Format?
Wanna to read pdf files on iPad? What is the easiest way to convert pdf to word for more editing? How to transfer pdf to iphone/ipod touch? How to share pdf files with your friends with a click?

These are some common questions and what follows is a detailed guide on how you may convert pdf files to another format using the pdf converter tools.
A. PDF Converter Mac
Mac PDF Converter is a super mate for Mac fans to optimize ebook reading experience. The amazing PDF converting software can easily and efficiently convert PDF to HTML, PDF to image, PDF to Text, PDF to EPUB on Mac OS. That's to say, you have more options to read or edit ebook documents than just Adobe Reader or Acrobat.
B. PDF to EPUB Converter Mac
PDF to EPUB Converter is remarkable with its easy-to-navigate interface and super high converting speed. It can assist ebook lovers converting PDF to EPUB format for reading eBooks on a wide range of eBook readers like iPad, iPhone, iPod Touch, Sony Reader, Barnes & Noble nook, Hanlin eReader, etc.
C. PDF to Word Converter Mac
PDF to Word Converter Mac is a simple and powerful tool to help you batch convert PDF to Word documents on Mac. When converting PDF to Word on Mac, the original PDF elements such as text, images, etc can be preserved in the converted Word files. Then you can easily reuse, extract or modify the contents of PDF in your Word on Mac.
D. PDF to text Converter Mac
PDF to Text Converter for Mac is a practical conversion program that facilitates Mac users extracting and reusing the unformatted Text from PDF document. As the program supports batch and selected conversion, you can simultaneously convert multiple PDF documents to .txt files, or just convert specific page(s).
E. PDF to HTML converter Mac
Mac PDF to HTML Converter is specially designed for Mac users to meet their needs of sharing PDF contents with others on the web. The PDF to HTML Converter for Mac can easily and efficiently convert PDF to HTML format for publishing on the web. It is a standalone program, you can use it without the assistance of any other program like Adobe Acrobat or Adobe Reader and so on.
F. PDF to image Converter Mac
Mac PDF to image Converter is specially designed for Mac users to convert their PDF files to several image formats such as JPEG, JPG, TIFF, PNG and more. With the brilliant PDF to image software, you can easily enjoy viewing ebooks in picture viewers without PDF reader.
Learn more about tips for mac, please go to the homepage website.
Wanna to read pdf files on iPad? What is the easiest way to convert pdf to word for more editing? How to transfer pdf to iphone/ipod touch? How to share pdf files with your friends with a click?
These are some common questions and what follows is a detailed guide on how you may convert pdf files to another format using the pdf converter tools.
A. PDF Converter Mac
Mac PDF Converter is a super mate for Mac fans to optimize ebook reading experience. The amazing PDF converting software can easily and efficiently convert PDF to HTML, PDF to image, PDF to Text, PDF to EPUB on Mac OS. That's to say, you have more options to read or edit ebook documents than just Adobe Reader or Acrobat.
B. PDF to EPUB Converter Mac
PDF to EPUB Converter is remarkable with its easy-to-navigate interface and super high converting speed. It can assist ebook lovers converting PDF to EPUB format for reading eBooks on a wide range of eBook readers like iPad, iPhone, iPod Touch, Sony Reader, Barnes & Noble nook, Hanlin eReader, etc.
C. PDF to Word Converter Mac
PDF to Word Converter Mac is a simple and powerful tool to help you batch convert PDF to Word documents on Mac. When converting PDF to Word on Mac, the original PDF elements such as text, images, etc can be preserved in the converted Word files. Then you can easily reuse, extract or modify the contents of PDF in your Word on Mac.
D. PDF to text Converter Mac
PDF to Text Converter for Mac is a practical conversion program that facilitates Mac users extracting and reusing the unformatted Text from PDF document. As the program supports batch and selected conversion, you can simultaneously convert multiple PDF documents to .txt files, or just convert specific page(s).
E. PDF to HTML converter Mac
Mac PDF to HTML Converter is specially designed for Mac users to meet their needs of sharing PDF contents with others on the web. The PDF to HTML Converter for Mac can easily and efficiently convert PDF to HTML format for publishing on the web. It is a standalone program, you can use it without the assistance of any other program like Adobe Acrobat or Adobe Reader and so on.
F. PDF to image Converter Mac
Mac PDF to image Converter is specially designed for Mac users to convert their PDF files to several image formats such as JPEG, JPG, TIFF, PNG and more. With the brilliant PDF to image software, you can easily enjoy viewing ebooks in picture viewers without PDF reader.
Learn more about tips for mac, please go to the homepage website.
Tuesday, June 7, 2011
Reciprocal link
|
Saturday, June 4, 2011
Easy reading ePub eBook on iPad, iPhone, Sony Reader and Nook.
Both PDF and ePub are popular formats in eBook world. Not only more than 90% eBooks of the multimedia world today are in ePub or PDF format, but also almost all eBook readers such as iPad, iTouch, Sony Reader, Amazon Kindle3, and Barnes and Noble Nook, etc.can read PDF or ePub eBooks. It is hard to tell the better eBook among PDF and ePub, because both of them have the advantages as well as the disadvantages.
Some eBook fans would like to read PDF eBooks because these eBooks have so accurate text layout that opening and reading them on an eBook reader is just like reading a true papery book. However, still a lot of eBook lovers prefer to read their favourite e-Novel with ePub format. Because it is really troublesome to zoom in and zoom out the size of eBook pages in the reading process. Moreover, figures and equations in science eBook with PDF format will not appear on eBook Reader such as Nook. However, these issue will not occur when reading a ePub eBook.

Most friends convert PDF to ePub before import eBooks into their iPad, Sony Reader, and Nook, Hanlin eReader etc. Software PDF to ePub converter easily helps them realize this PDF to ePub conversion, and converted ePub eBooks allow reader devices to display story pages on the whole screen. Moreover, two versions are available: PDF to EPUB Converter and Mac PDF to EPUB Converter.
If you want to read/transfer pdf on iPad, here is a step by step guide: http://pdf-to-epub.com/tutorials/pdf-to-ipad-mac.html
Learn more about tips for mac, please go to the homepage website.
Learn more about tips for mac, please go to the homepage website.
Some eBook fans would like to read PDF eBooks because these eBooks have so accurate text layout that opening and reading them on an eBook reader is just like reading a true papery book. However, still a lot of eBook lovers prefer to read their favourite e-Novel with ePub format. Because it is really troublesome to zoom in and zoom out the size of eBook pages in the reading process. Moreover, figures and equations in science eBook with PDF format will not appear on eBook Reader such as Nook. However, these issue will not occur when reading a ePub eBook.
Most friends convert PDF to ePub before import eBooks into their iPad, Sony Reader, and Nook, Hanlin eReader etc. Software PDF to ePub converter easily helps them realize this PDF to ePub conversion, and converted ePub eBooks allow reader devices to display story pages on the whole screen. Moreover, two versions are available: PDF to EPUB Converter and Mac PDF to EPUB Converter.
If you want to read/transfer pdf on iPad, here is a step by step guide: http://pdf-to-epub.com/tutorials/pdf-to-ipad-mac.html
Learn more about tips for mac, please go to the homepage website.
Learn more about tips for mac, please go to the homepage website.
Subscribe to:
Posts (Atom)